
Welcome to
Portraits by Wendy Dyer


Elevate Your Space with Photorealistic Custom Portraits, Thoughtfully Created Just for You
Handcrafted Artwork in Colored Pencil & Acrylic
Welcome! I’m Wendy an artist based in Weaverville, NC, specializing in creating custom portraits that capture the true essence of your loved ones, mementos, and homes. Ranging from a cherished pet, a family member, a special moment, or a family structure, I bring your memories to life through photorealistic colored pencil and acrylic paintings.
Each portrait is a deeply personal reflection, created with a keen eye for detail and a commitment to preserving the unique spirit of your subject. As a mother and part-time commission artist, I work from my home studio, balancing family life with my passion for creating meaningful artwork that lasts a lifetime.

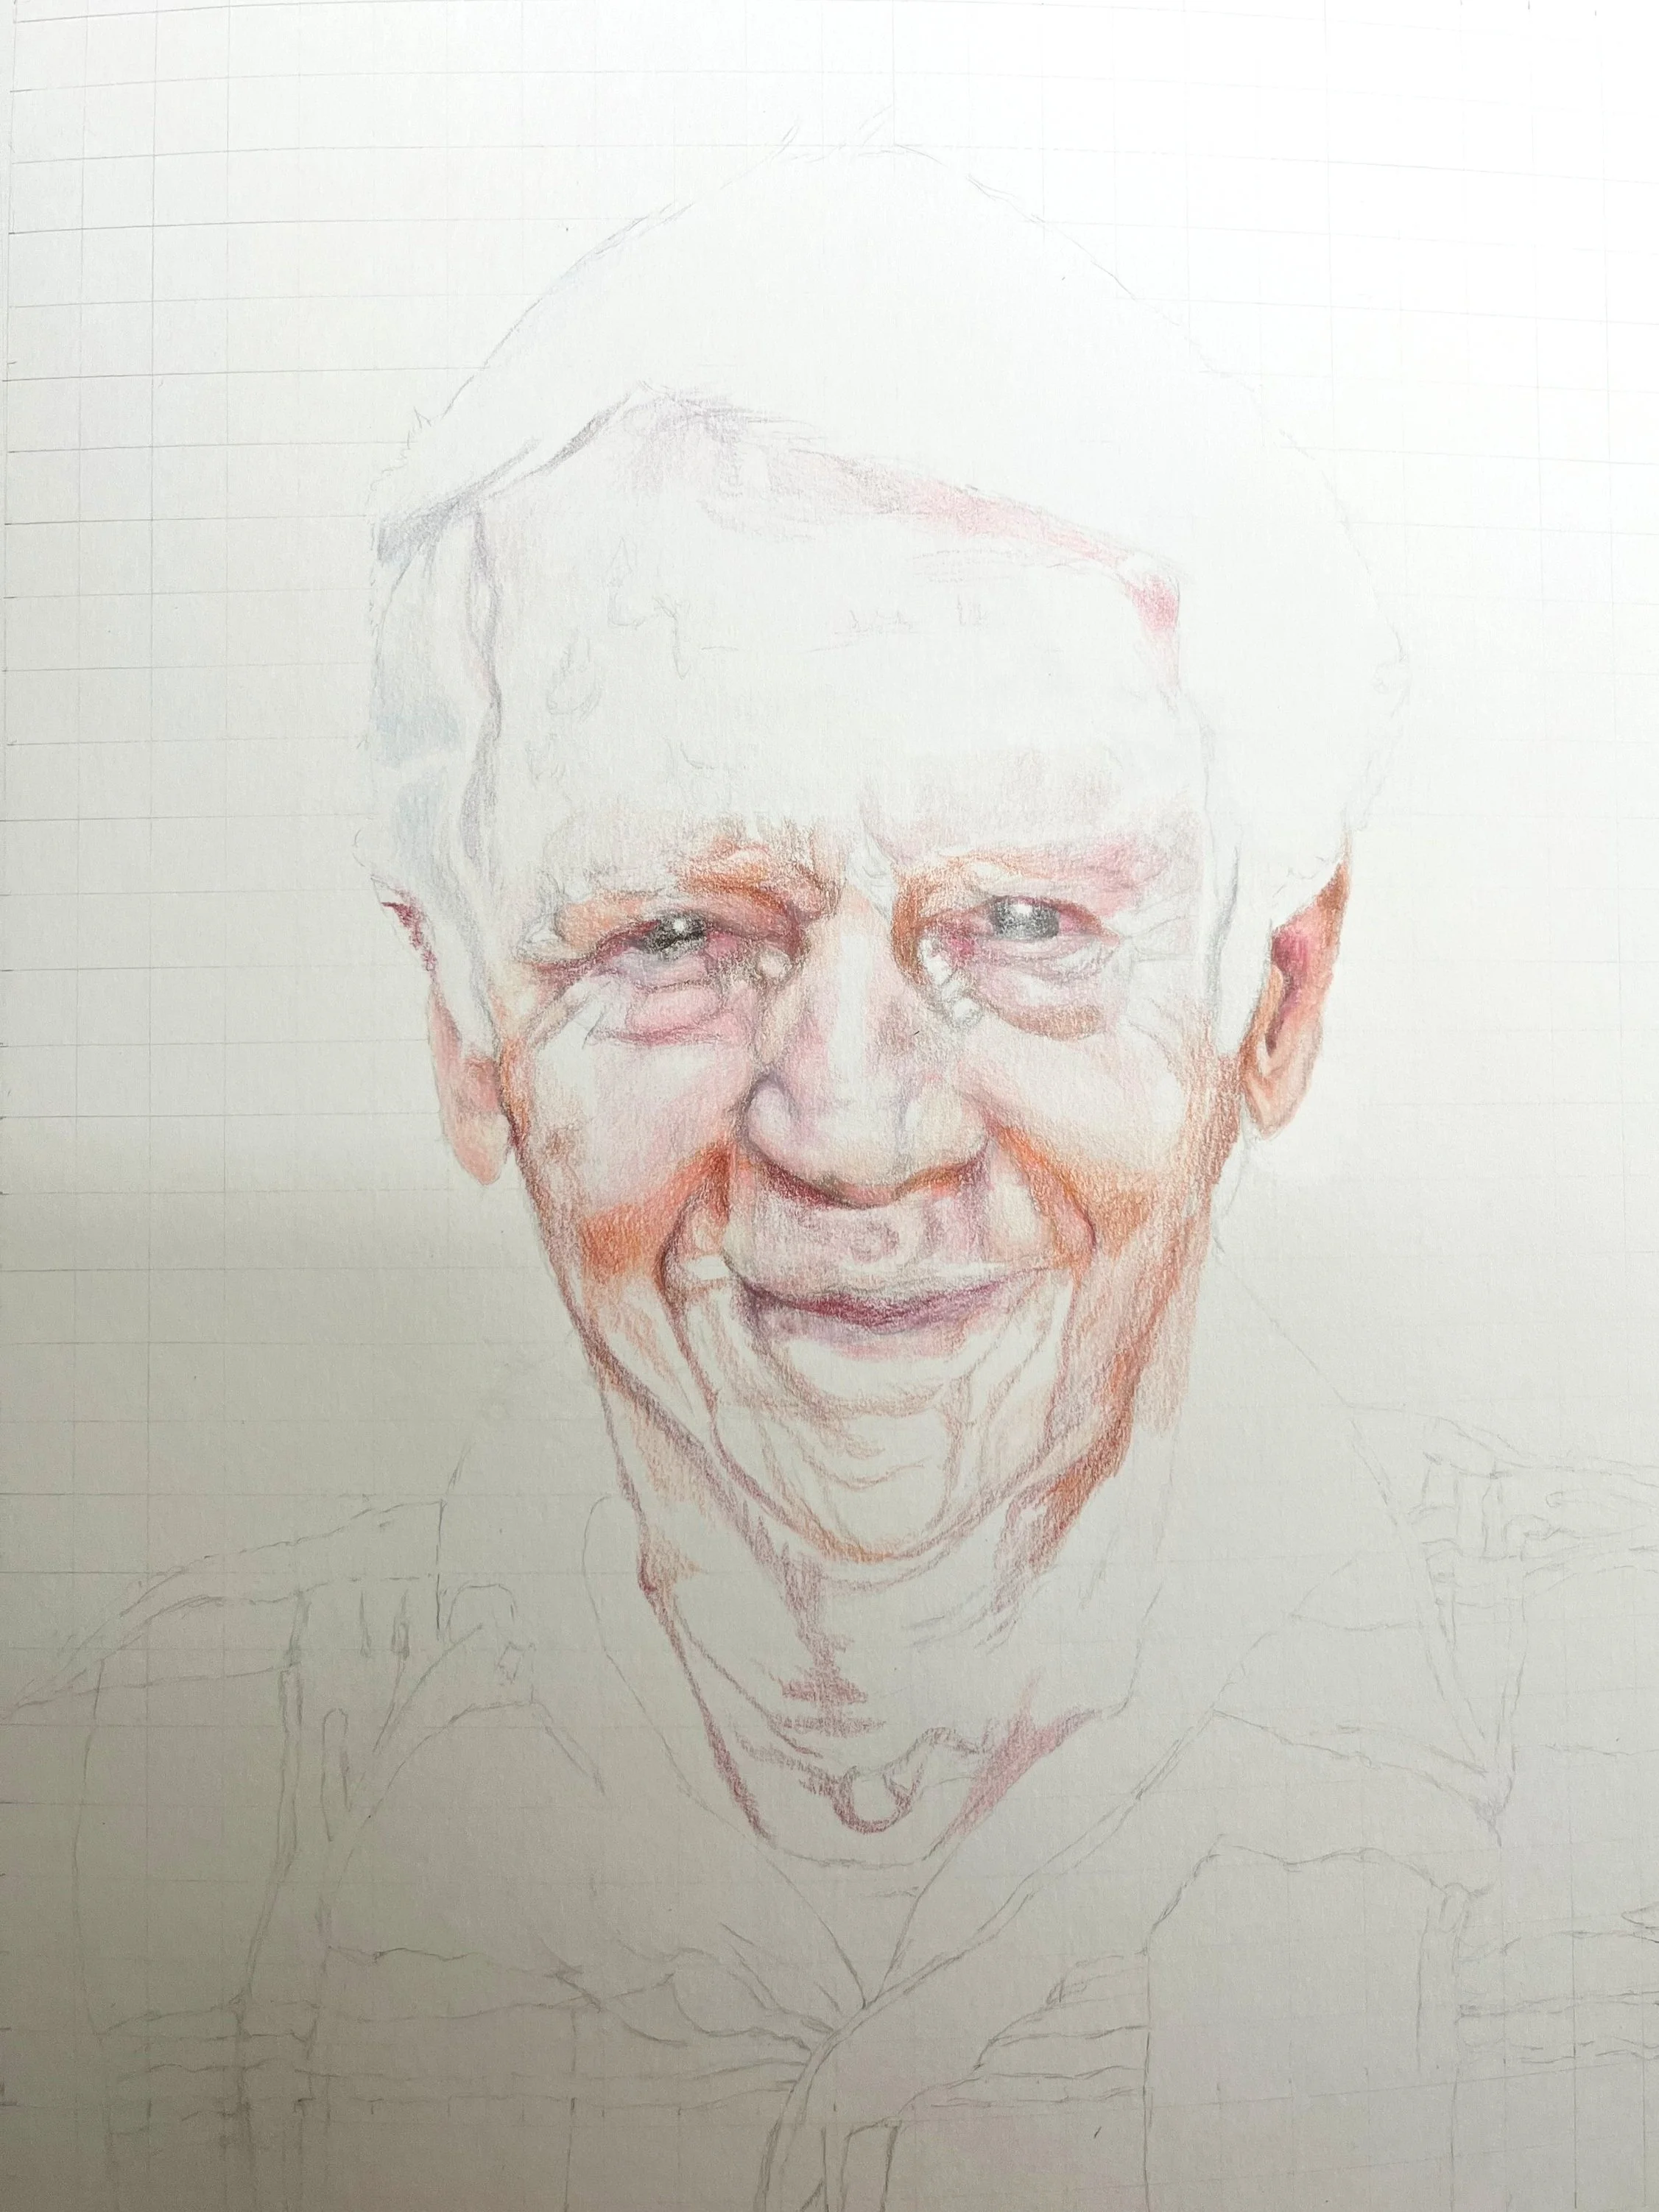
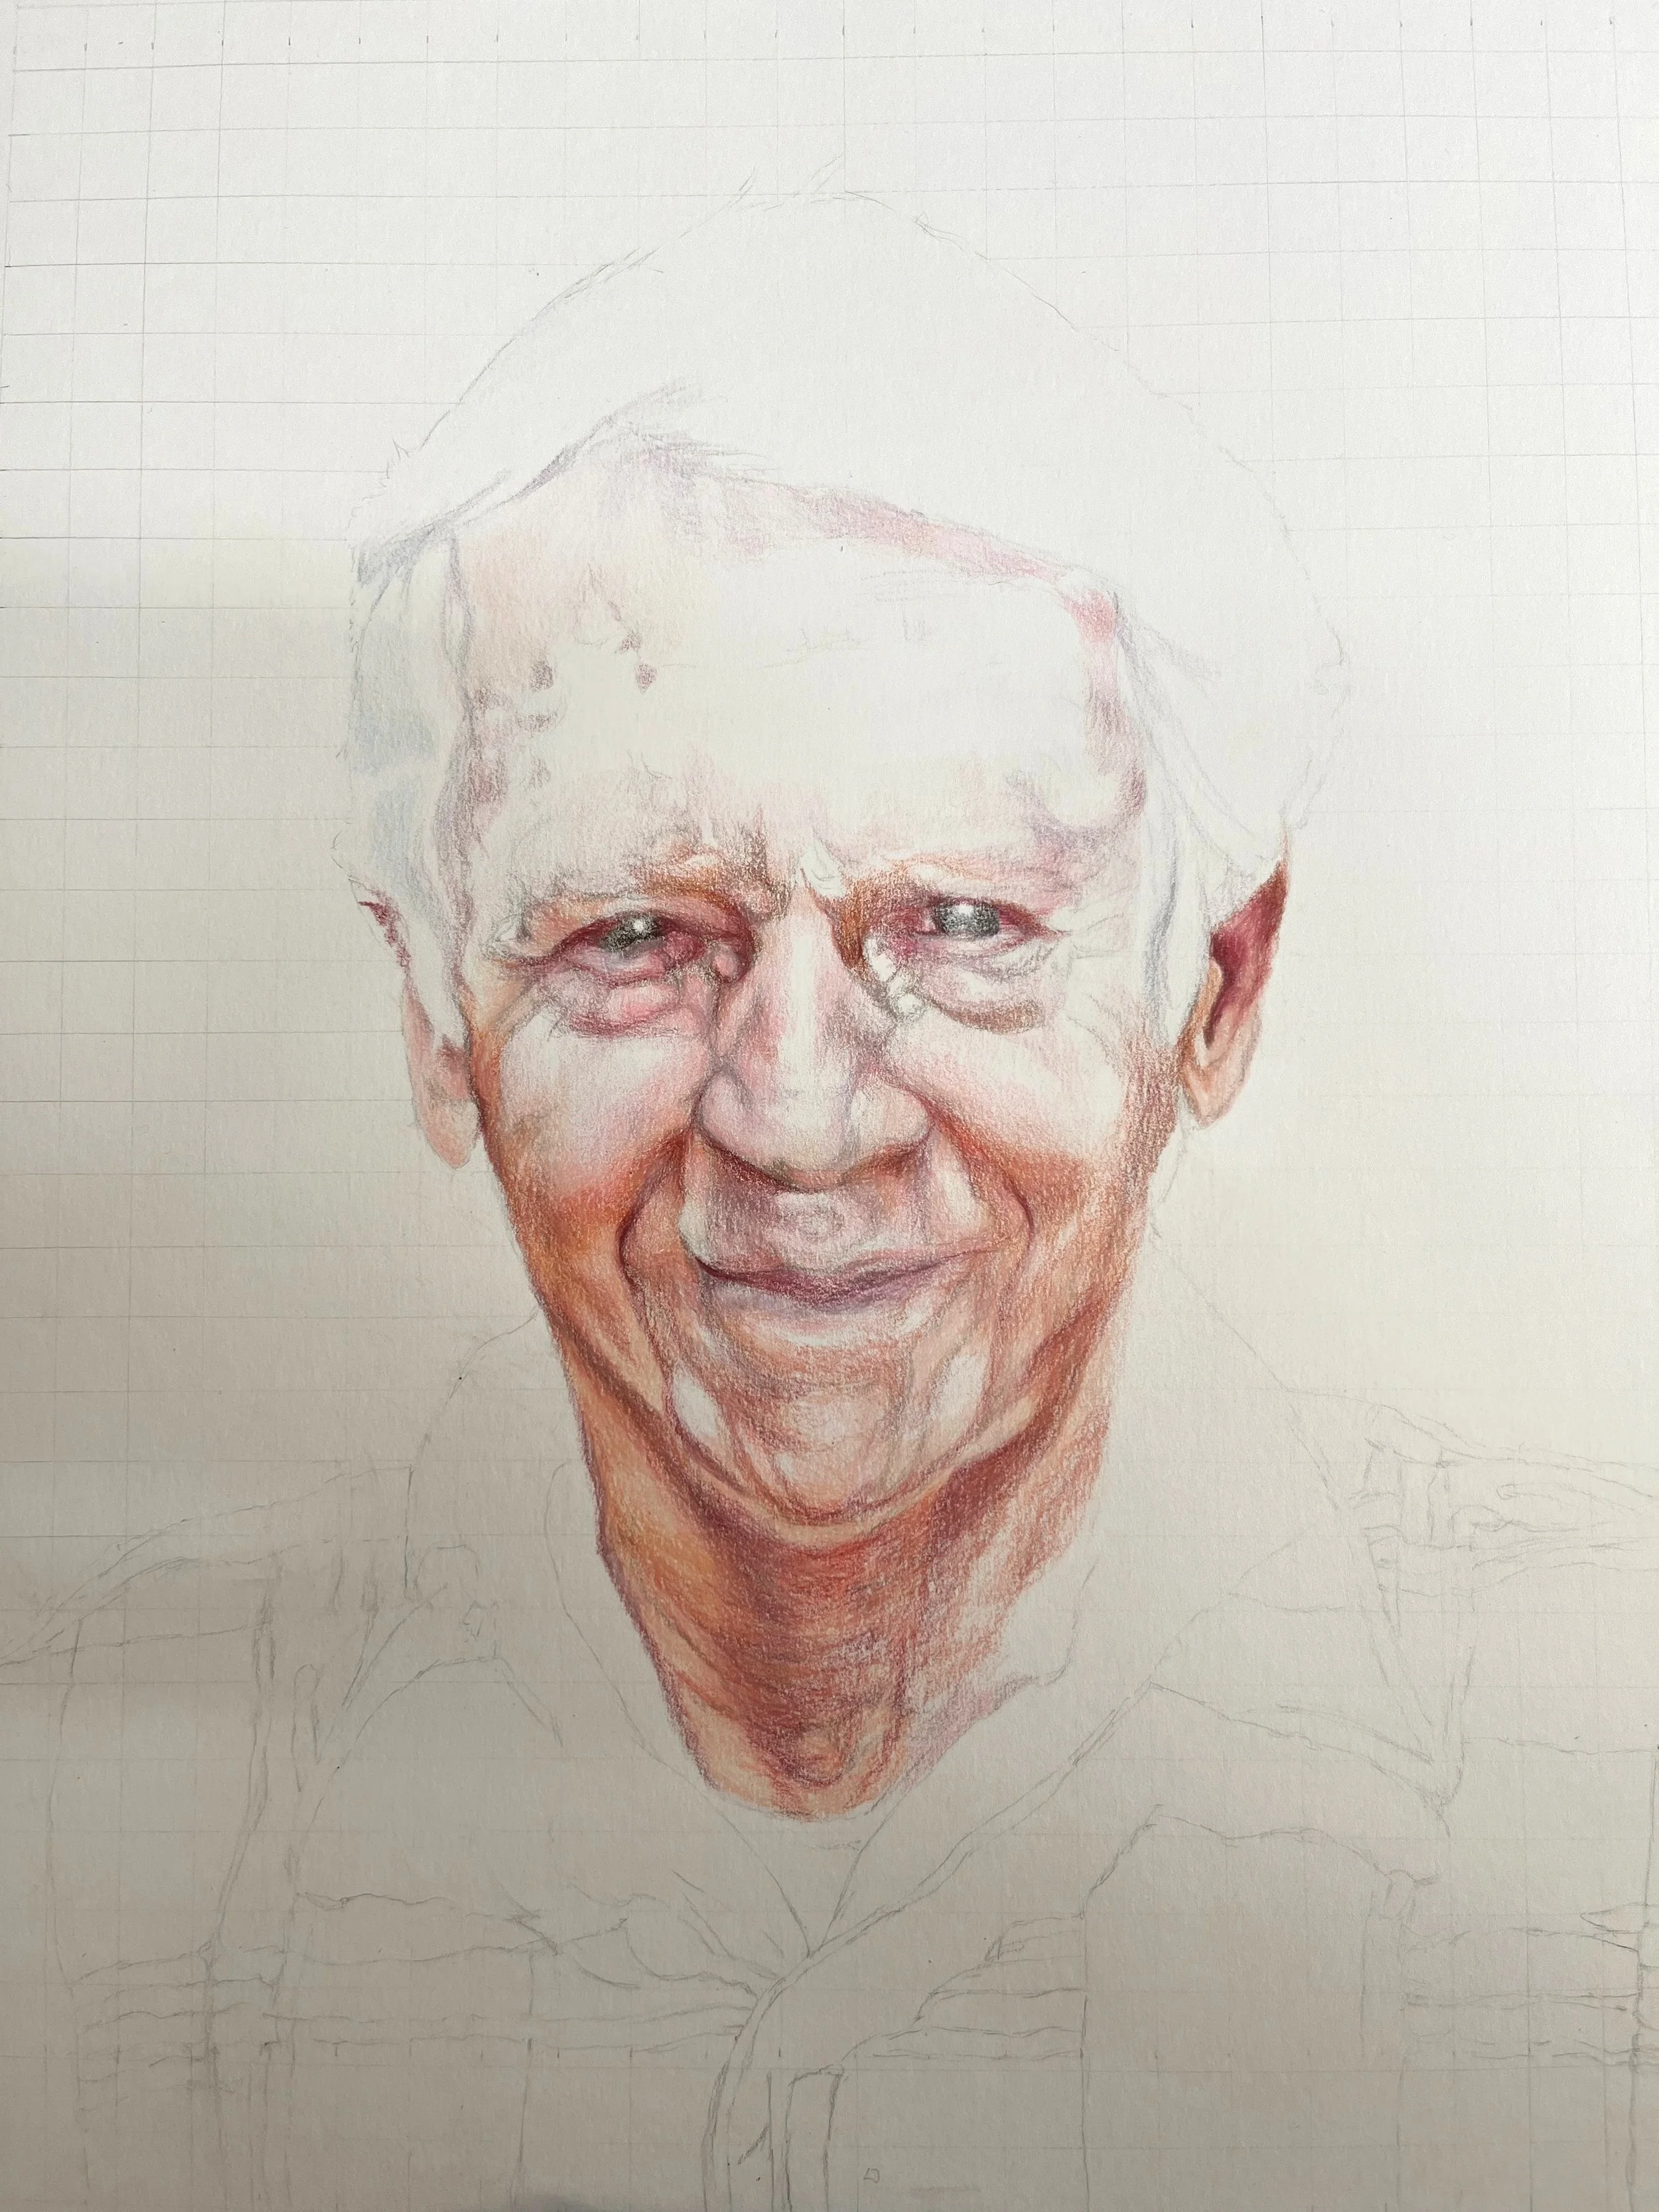
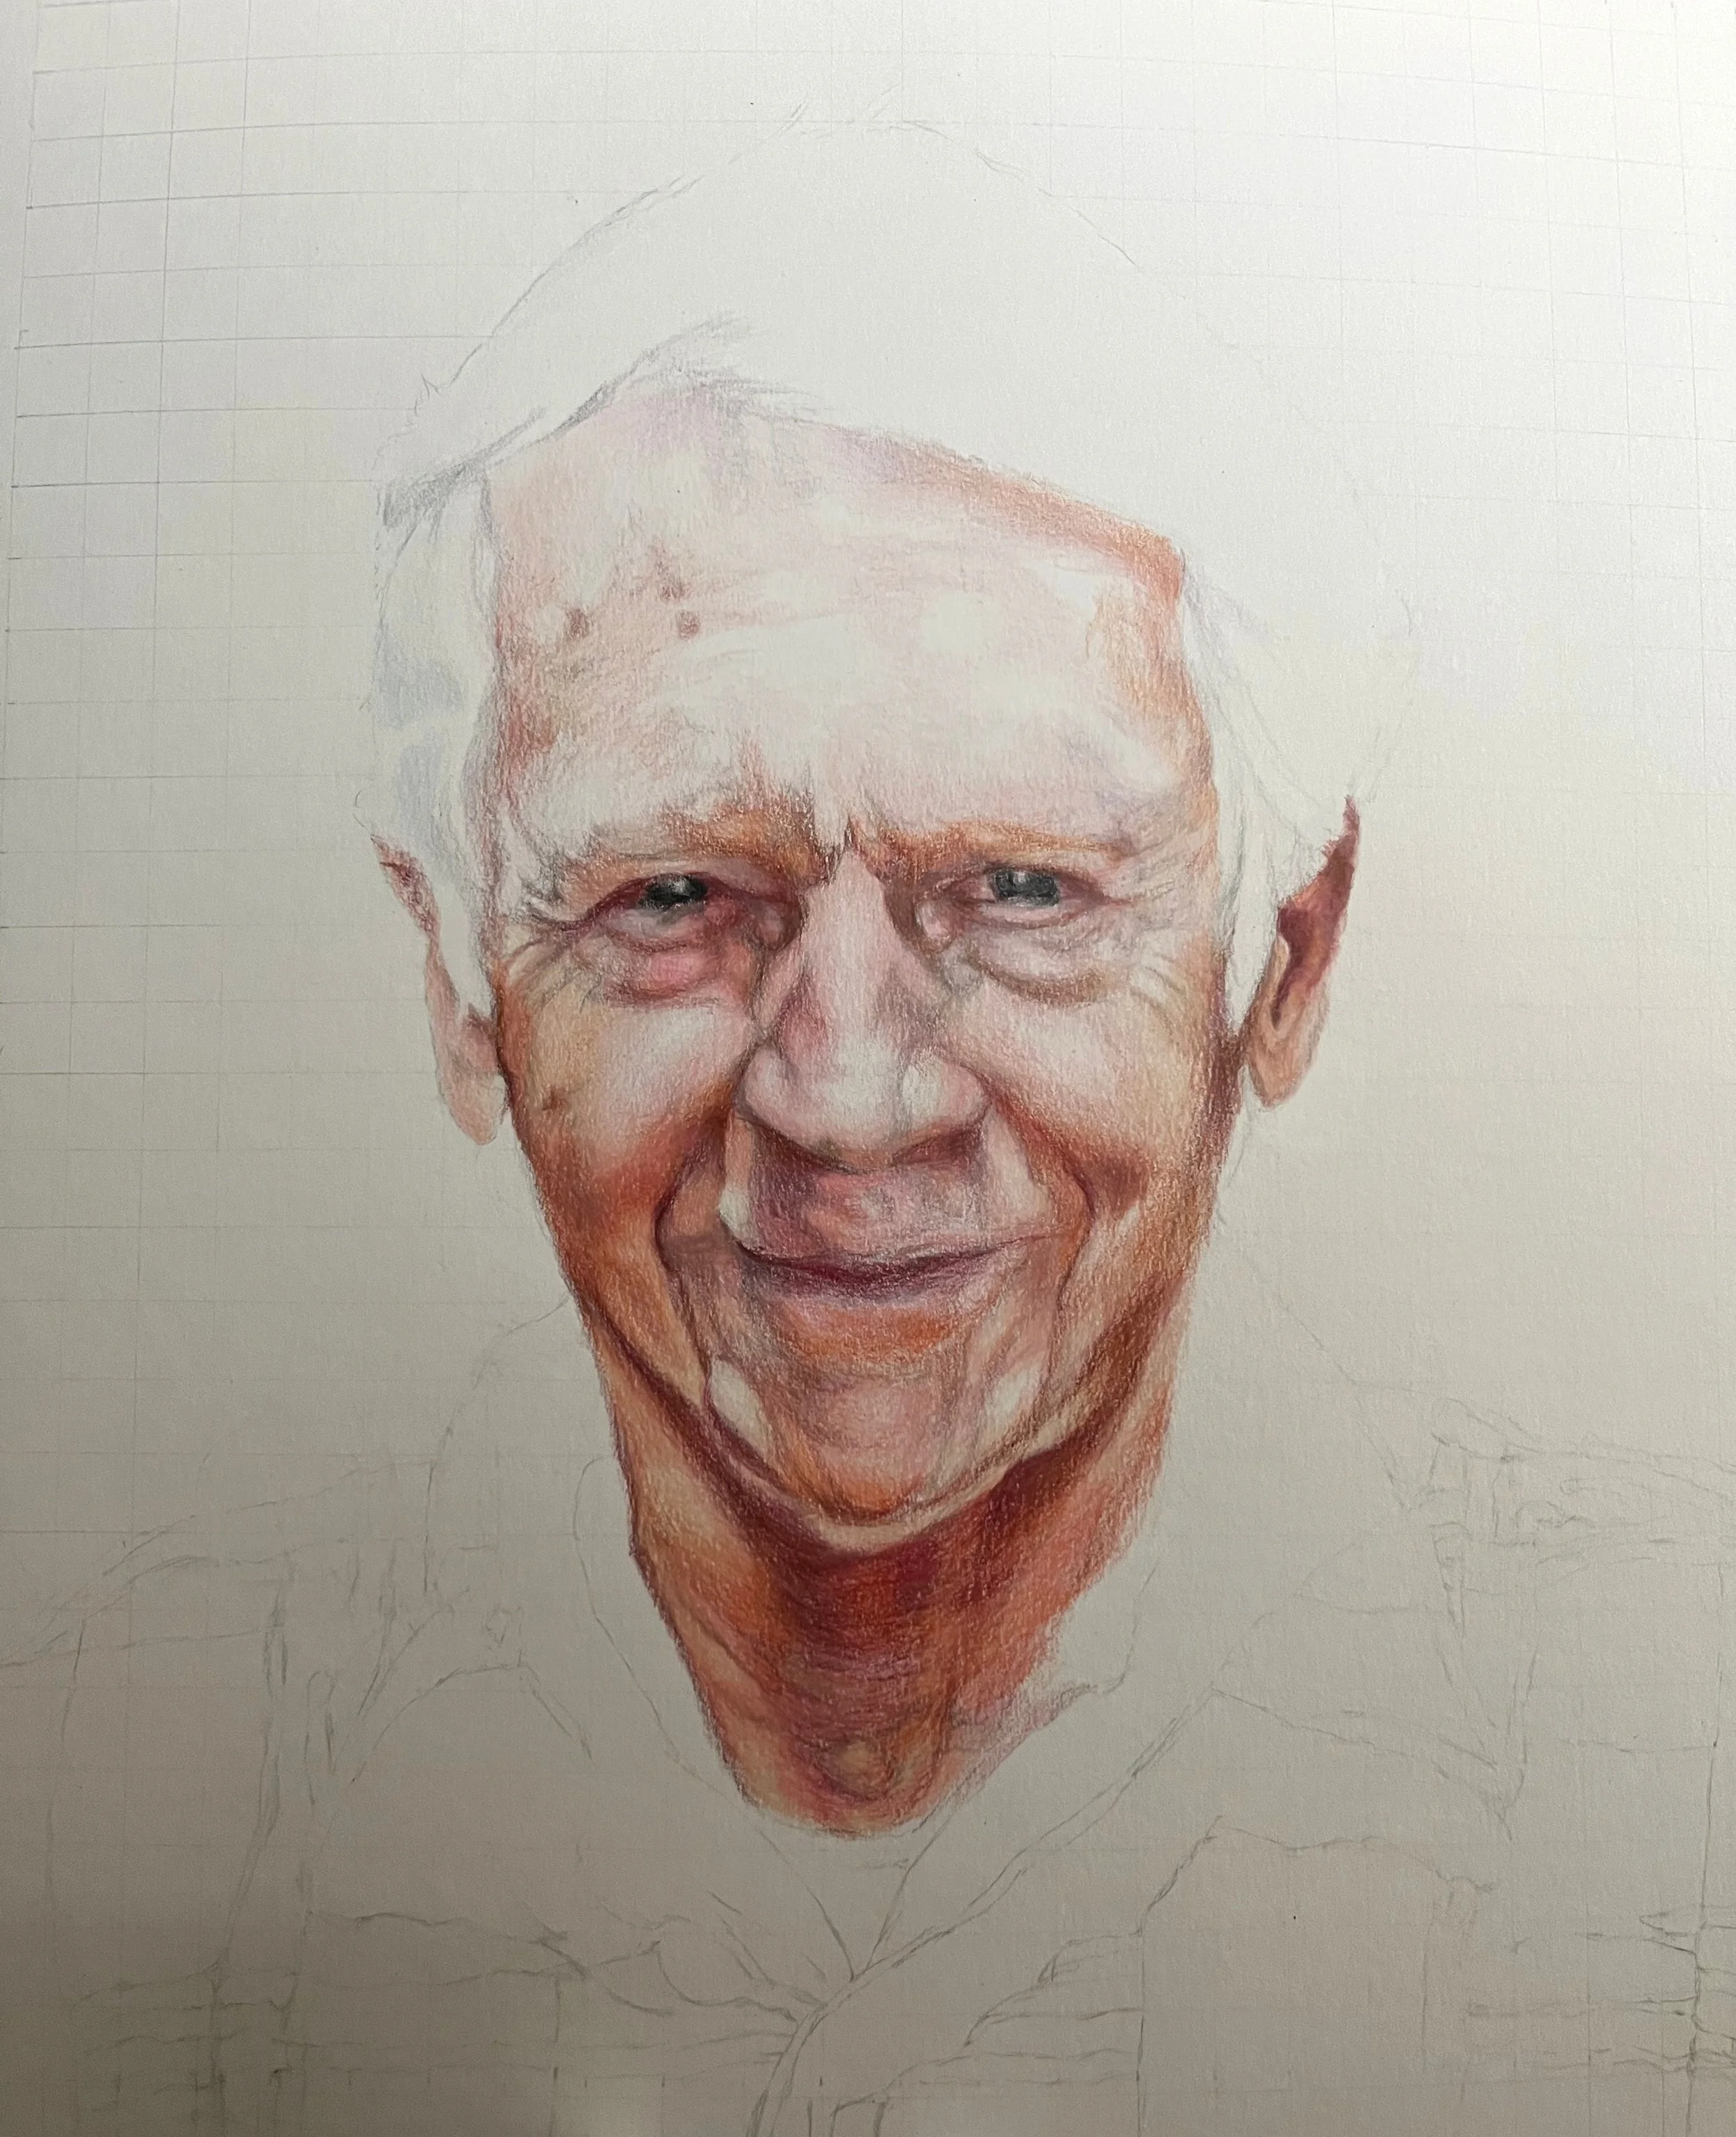
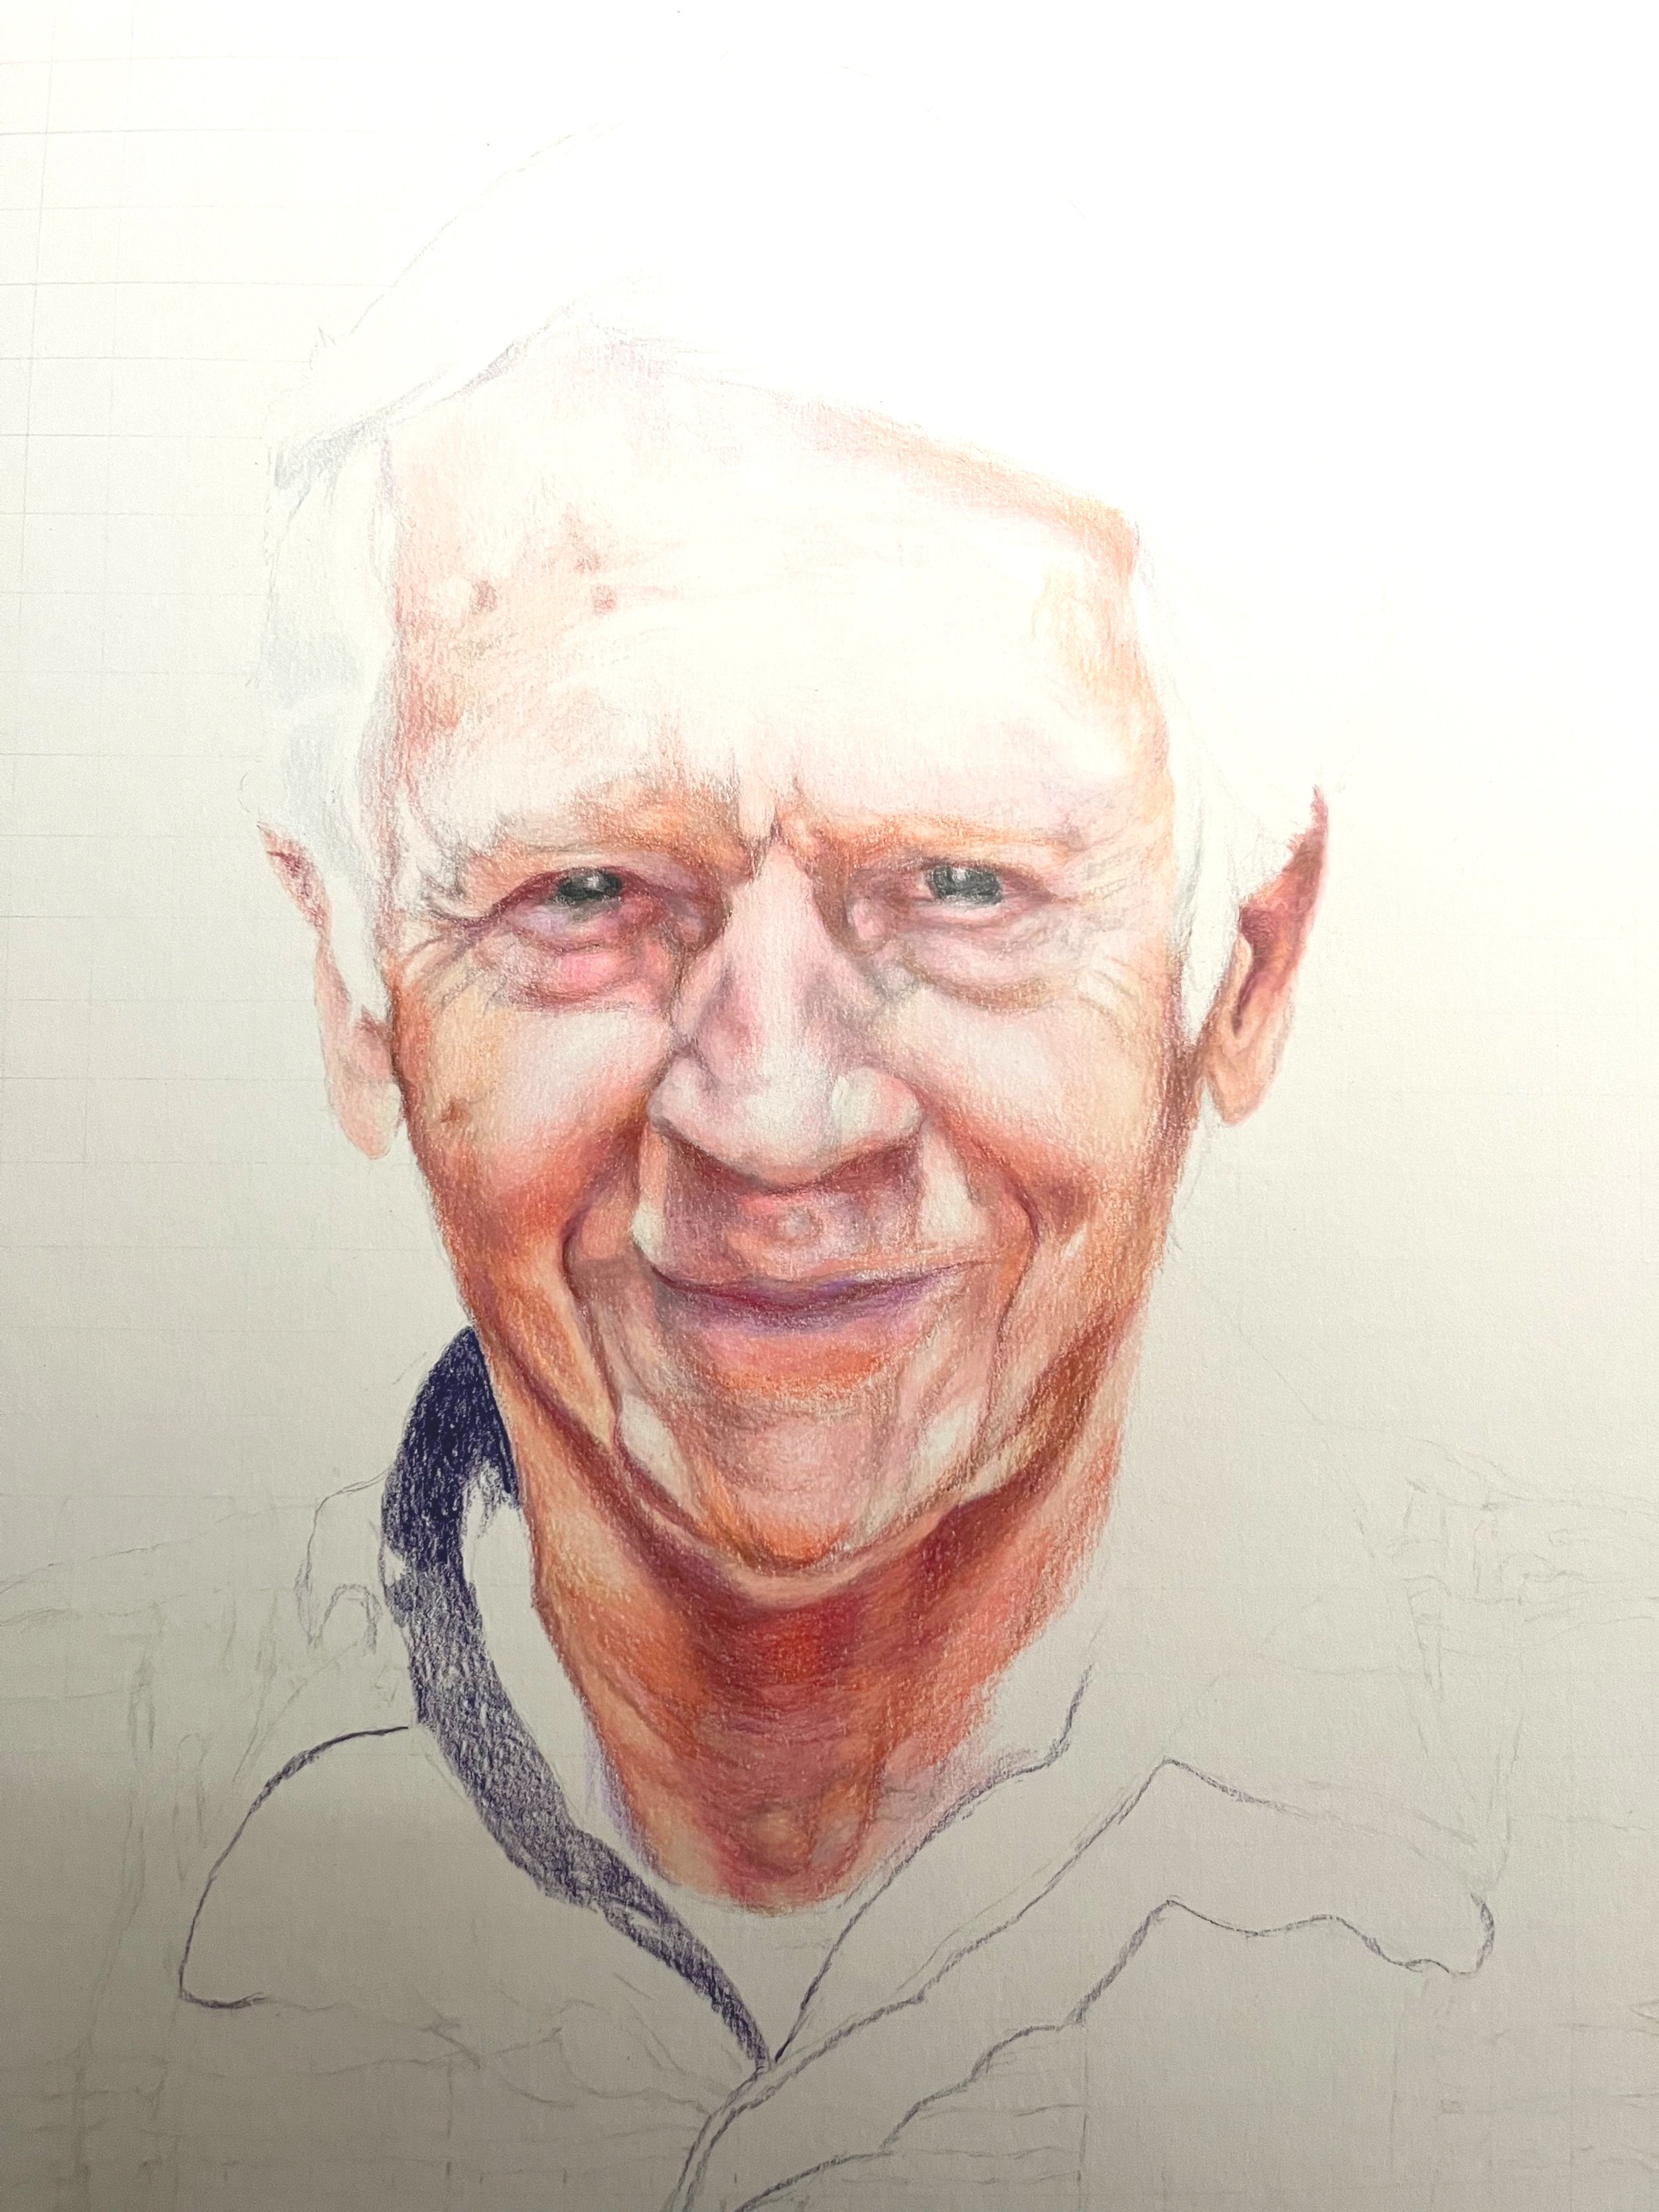
The Colored Pencil Process
Creating art with colored pencils is a thoughtful and layered process that allows me to build up rich textures, subtle gradients, and vibrant details.
The beauty of colored pencil work lies in its precision and the ability to layer pigments to achieve depth and richness. It’s a slow and deliberate process, but the end result is always worth the patience.
-
![step 1 in colored pencil drawing process]()
1. Sketching the Foundation: Every piece starts with a light sketch. I carefully outline the subject—whether it's a portrait, a still life, or any other subject—keeping the lines light and fluid so they don’t interfere with the layers of color to come. This step ensures that I have the correct proportions and composition before diving into the more detailed work.
-
![step 2 in colored pencil drawing process]()
2. Layering Colors: Once the initial sketch is in place, I begin applying the first layers of color. This stage often involves applying light, smooth layers to build up the base tones. I work slowly, focusing on creating a solid foundation before adding more intensity. Because colored pencils are translucent, I can layer different colors on top of one another, which gives the piece richness and depth.
-
![step 3 in colored pencil drawing process]()
3. Adding Depth and Detail: With multiple layers of color, I begin to refine the details—shadows, highlights, and fine lines. The beauty of colored pencils is in their ability to capture fine details, such as the texture of skin, fabric, or hair. I use various techniques like burnishing (applying heavy pressure to create a smooth, polished finish) and layering to create realistic textures and depth. At this point, the piece begins to come to life.
-
![step 4 in colored pencil drawing process]()
4. Fine-Tuning and Blending: After building up the colors, I carefully blend and smooth the layers together using either the pencils themselves or a blending tool. This helps soften transitions between colors and smooth out any rough textures. I might use a blending stump, a colorless blender pencil, or even a solvent to create a more seamless look, depending on the desired effect.
-
![step 5 in colored pencil drawing process]()
5. Final Details: The final step is all about refining the artwork. I’ll go back over the piece, adding tiny highlights or adding any missing details that will make the subject pop. At this stage, the drawing should feel complete, with rich layers of color, fine details, and a harmonious flow throughout.

The Acrylic Paint Process
Acrylic painting is a dynamic and versatile medium that allows me to experiment with texture, color, and layering. The process is both exciting and meditative, as it involves building up layers of vibrant paint to create depth, dimension, and texture.
1. Preparing the Canvas: Before starting a painting, I prepare my canvas by either stretching it or using a pre-stretched canvas, ensuring it’s properly primed to absorb the paint. Some artists like to use a thin layer of gesso to seal the surface, but I often prefer to work with a canvas that's already prepped, allowing me to jump straight into the creative process.
2. Sketching the Composition: Once the canvas is ready, I sketch out the basic composition with a light pencil or thinned-out acrylic paint. This is where I map out the placement of my subject—whether it’s a portrait, landscape, or abstract piece. The sketch serves as a guide to ensure that the proportions and layout are correct before I start applying the paint.
3. Blocking in Colors: Next, I begin applying the first layers of acrylic paint. This is often referred to as "blocking in" the colors. At this stage, I work quickly and loosely, using broad strokes to lay down the basic shapes and tones of the composition. Acrylic paints dry fast, which allows me to build up layers rapidly, but I must be mindful of blending and mixing, as the paint can also dry too quickly in certain conditions.
4. Layering and Building Depth: Acrylics are perfect for layering. Once the initial colors are down, I build depth by adding additional layers of paint. I’ll work from dark to light, focusing on shadows, highlights, and mid-tones to create dimension. Each layer of paint can add more complexity and richness to the piece. The beauty of acrylics is their ability to be used in both thin, transparent washes and thick, textured layers, giving me a lot of freedom in how I approach a painting.
5. Detailing and Refining: As the painting progresses, I focus on adding finer details, such as facial features, textures, and intricate patterns. At this stage, I can use smaller brushes for precision and even incorporate techniques like glazing, where I apply a thin, transparent layer of paint to adjust the color or tone. Acrylics allow for great flexibility here; they can be thinned with water or mediums to create different effects, such as a watercolor-like transparency or a smooth, glossy finish.
6. Textures and Finishing Touches: Acrylics can also be used to create a variety of textures. I might incorporate palette knives, sponges, or even my hands to create texture on the canvas—whether it’s for creating a rough surface or adding a tactile element. I also use varnishes to add a final glossy or matte finish, depending on the look I want to achieve. This layer of varnish protects the painting and enhances its longevity.
7. Drying and Final Adjustments: Acrylic paint dries quickly, so I often take breaks to allow different layers to set before continuing. Once the painting is complete, I allow it to dry thoroughly before making any final tweaks. During this phase, I review the piece for any areas that might need more contrast, subtle highlights, or additional details.
The entire process is a rewarding journey of building, layering, and refining. Acrylic paints offer a vibrant, forgiving medium that allows me to experiment, make changes, and express myself freely. It’s a medium that gives me the flexibility to work quickly or take my time, depending on the mood and vision for the piece.


Wedding Day Memories

Creating a photo-realistic wedding portrait with colored pencils is a meticulous process that requires patience, skill, and an eye for detail. Each layer of color brings the portrait closer to life, capturing not only the physical likeness of the couple but the essence of their special day. The result is a timeless keepsake that can be cherished for years, a unique piece of art that immortalizes the love, joy, and beauty of the wedding day.

The Fresh Bouquet
A photorealistic drawing of a wedding bouquet is a true celebration of nature's beauty and an excellent way to capture the emotions and memories associated with a wedding. Every detail—from the soft petals to the delicate water droplets—is carefully crafted to reflect the real-life beauty of the flowers, resulting in a portrait that evokes the essence of the special day. The final artwork becomes more than just a drawing; it’s a cherished keepsake that encapsulates the love, joy, and beauty of a wedding in a tangible form.
My love for florals doesn't stop at the canvas—I'm also a skilled floral designer, creating stunning arrangements that reflect the same attention to detail and artistic vision. Whether it's designing a breathtaking bouquet for your special day or crafting a one-of-a-kind painting of your favorite flowers, I bring the world of flowers to life with both artistry and heart.
A Menagerie of Animals: The Art of Fur, Feather and Scale
A Menagerie of Animals: The Art of Fur, Feather and Scale

Drawing and painting animals is a fascinating and rewarding journey, as each species has its own unique characteristics, textures, and behaviors to capture. In the soft fur of a dog, the sleek scales of a fish, or the vibrant feathers of a bird, each animal offers an opportunity to explore a new set of challenges and creative possibilities.
The Process Of Drawing Structure
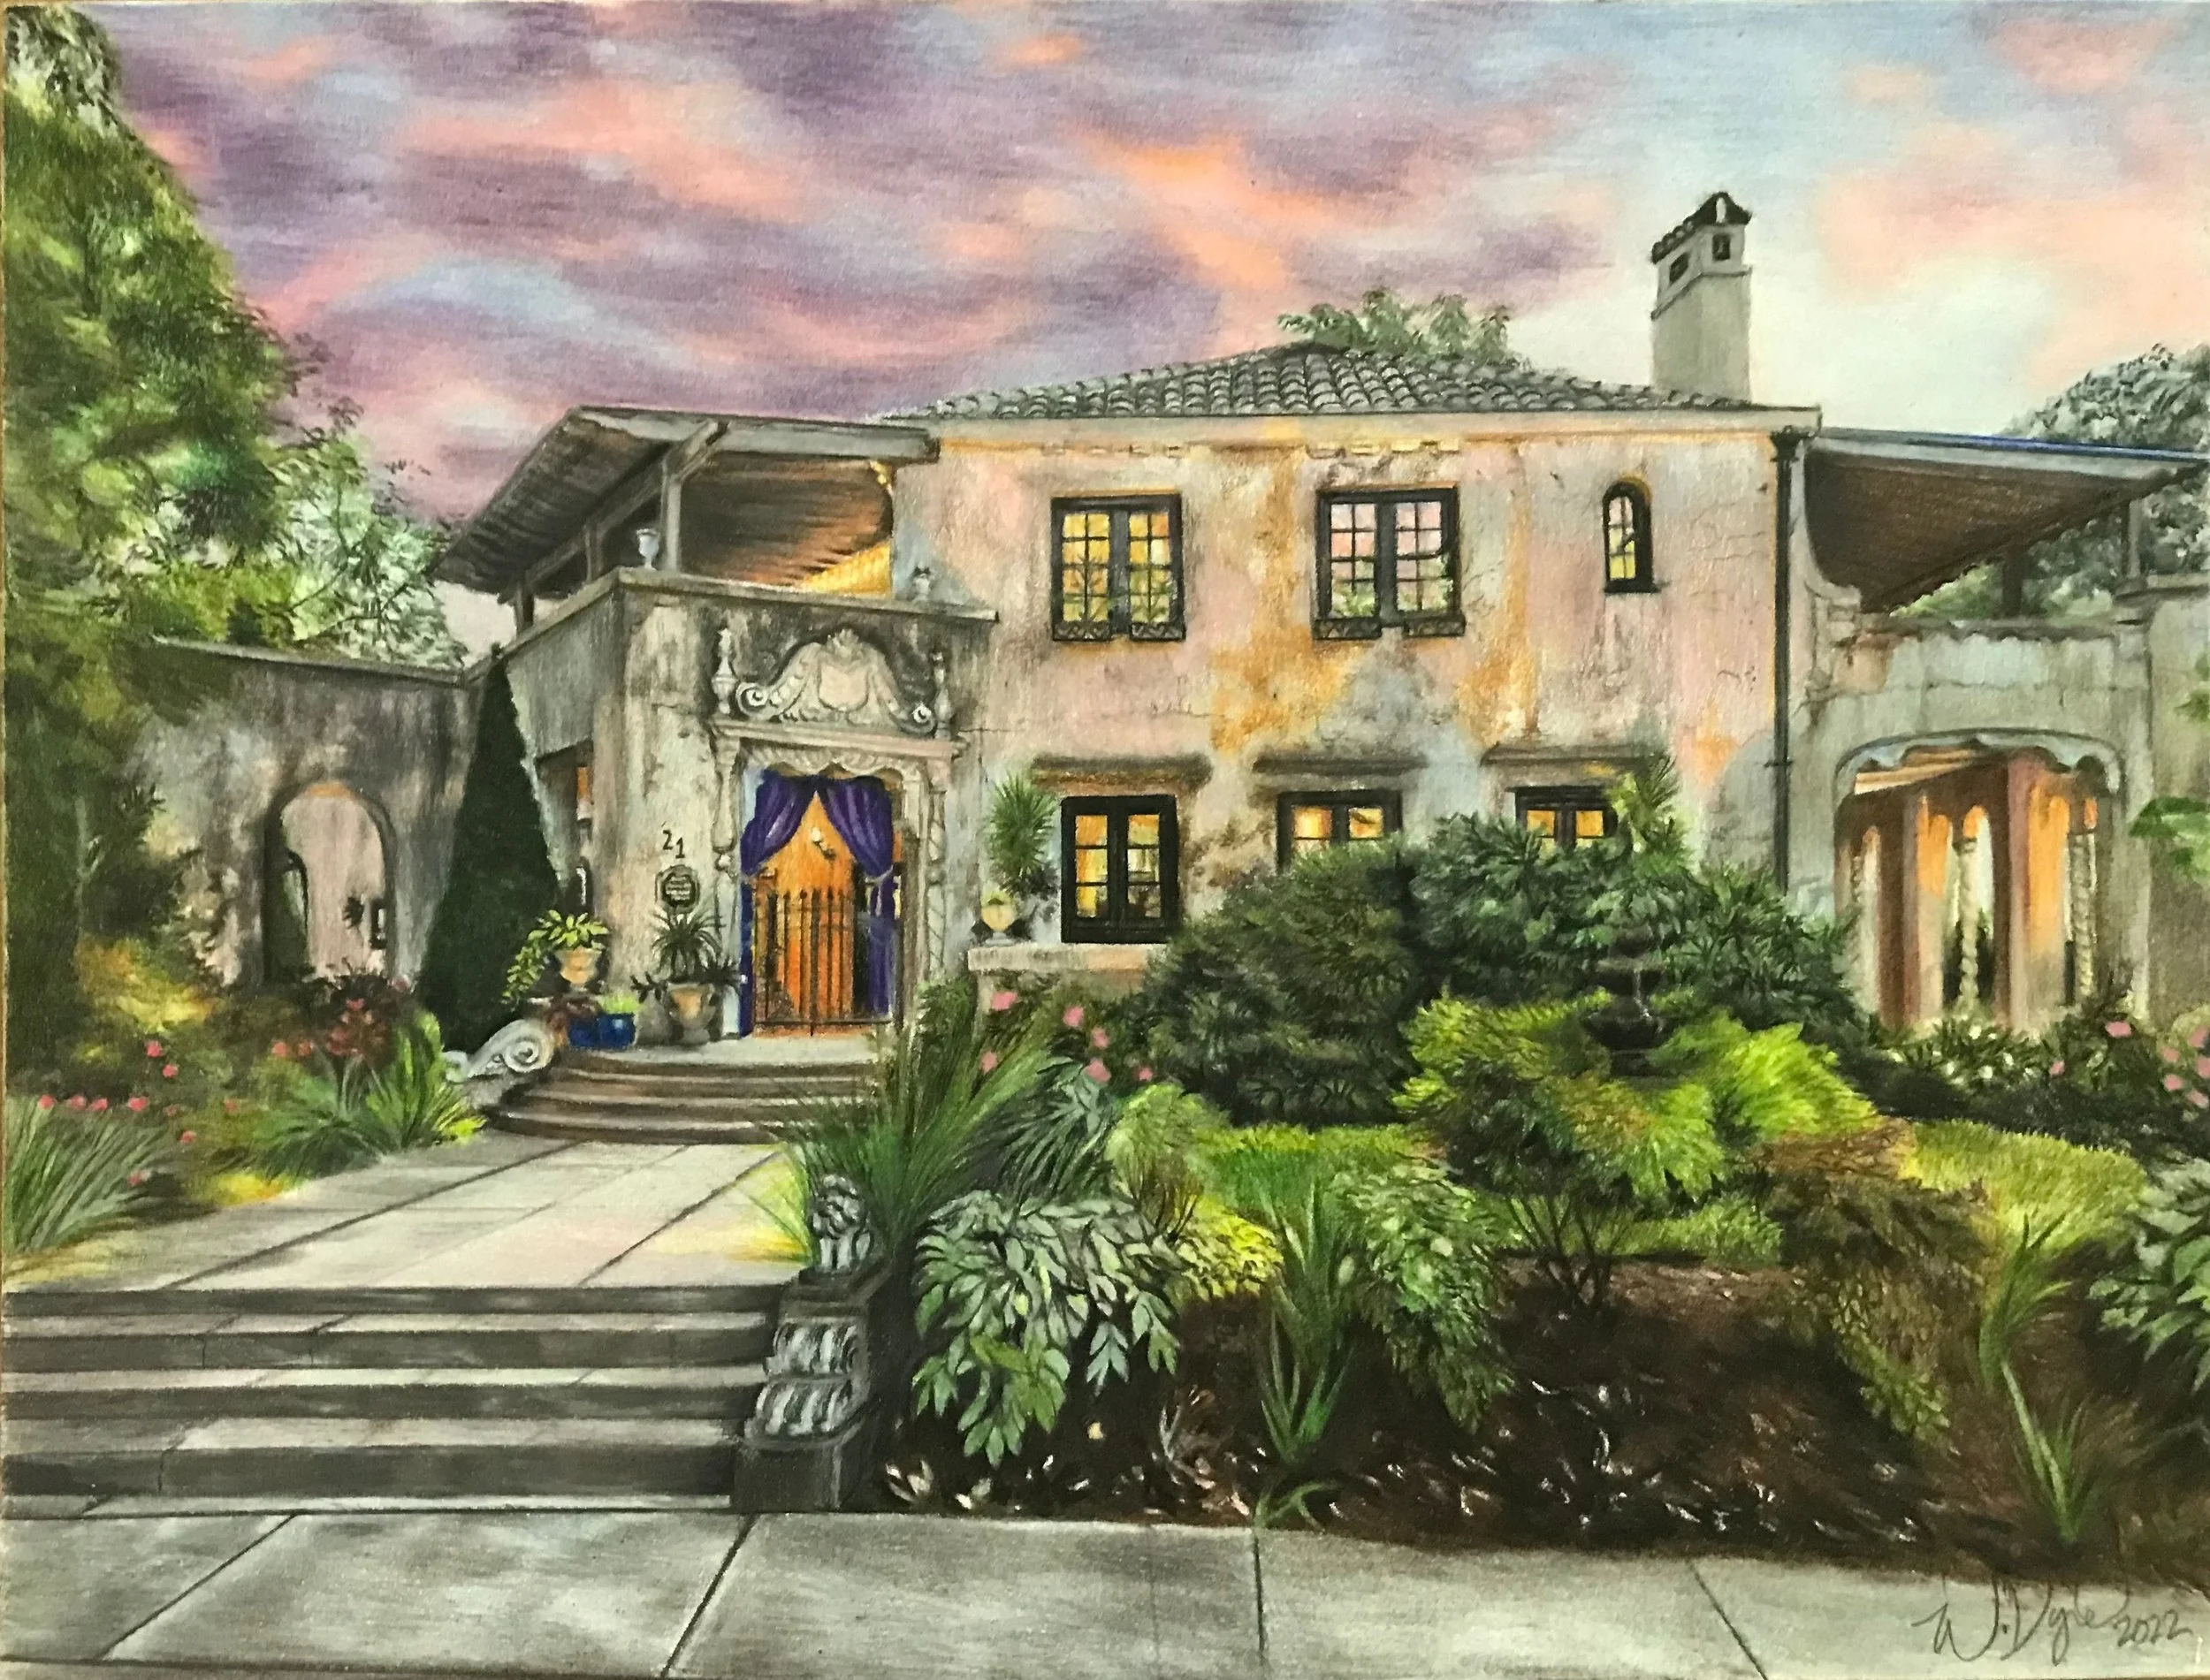
Drawing a house portrait is a special and personal endeavor, as it captures not only the physical structure of a home but also the memories and emotions associated with it. Whether it’s a family home, a dream house, or a place with deep sentimental value, creating a portrait of a house allows me to bring that space to life in a unique and meaningful way. Here’s a breakdown of the process I follow to create a house portrait:
1. Gathering Reference and Inspiration: The first step in drawing a house portrait is gathering reference materials. If I’m drawing a home that someone owns, I’ll ask for clear photographs from different angles, ensuring I capture the full exterior of the house. It's helpful to get photos taken at various times of day to understand how light plays on the building and its surroundings. I also gather any additional elements that might be important, such as specific landscaping, unique architectural features, or notable details that will make the house feel personal.
2. Sketching the Basic Structure: Once I have my reference material, I begin with a light pencil sketch. At this stage, I focus on the basic structure of the house—getting the proportions right, aligning the roof, windows, doors, and the general shape. I take special care to pay attention to perspective to ensure the house looks three-dimensional. For more complicated compositions, I might use grid lines or a ruler to keep the angles and lines precise.
3. Refining Details and Architectural Features: After the basic outline is established, I begin refining the details of the house. I focus on windows, doors, rooflines, and any unique features such as balconies, chimneys, or columns. It’s important to capture the character of the house, whether it’s a cozy cottage with small, rounded windows or a grand mansion with intricate moldings and large windows. This is the time to get the details right, as they give the house its individuality.
4. Adding Texture and Depth: Once the house’s form is well-defined, I begin adding texture to convey the materials and surfaces. Whether the house is made of brick, wood, stone, or stucco, the texture helps bring realism to the drawing. For example, I might use cross-hatching or stippling to suggest the rough texture of brick or the smoothness of a plaster wall. If the house has a textured roof, I might use short, angled strokes to replicate shingles or tiles. The depth of the piece is built up by gradually adding darker values to areas where shadows fall, like beneath eaves or around window frames.
5. Focusing on Light and Shadow: Light and shadow play a critical role in creating a realistic house portrait. I look closely at the lighting in the reference photos to determine where the light source is coming from. This could be natural sunlight, street lamps, or shadows from nearby trees. I focus on creating strong contrasts in my shading to show the depth of the house. Windows and doors can be framed with shadows, and I pay special attention to areas like the roof and any overhangs that might have darker shadows. Shadows help ground the house and make it appear more lifelike.
6. Adding Color and Detail (if applicable): If the house portrait is in color, the next step involves choosing the right colors to bring the house to life. I might use colored pencils, watercolors, or acrylics depending on the desired effect. For a watercolor painting, I would use soft washes of color for the building’s structure, allowing the layers to dry before adding more layers for depth. If I’m using colored pencils, I carefully layer different shades of color to build up the tones of the house and its surroundings, paying close attention to the color of the roof, walls, windows, and any surrounding elements like plants, fences, or pathways. The greenery around the house, like trees, bushes, and flowers, can add vibrancy and life to the artwork.
7. Refining the Surrounding Landscape: While the house is the focal point, I often incorporate elements of its environment to give context and tell the story of the home. This might include the front yard, garden, driveway, or even the street where the house is located. I ensure these elements complement the house and don't detract from it, but they can add important details that help complete the portrait. If the house has a large tree in the yard or flowers blooming in the garden, I’ll add these in, considering how they interact with the lighting and shadow around the house.
8. Final Touches and Adjustments: The final step in the process is making adjustments to the entire piece. I step back and assess the drawing or painting to make sure the composition feels balanced. If necessary, I enhance the details, such as adding highlights to windows, trimming up any rough edges, or refining textures on the roof or walls. I might also adjust the contrast, deepening shadows or brightening up lighter areas to add even more depth to the piece.
About Me
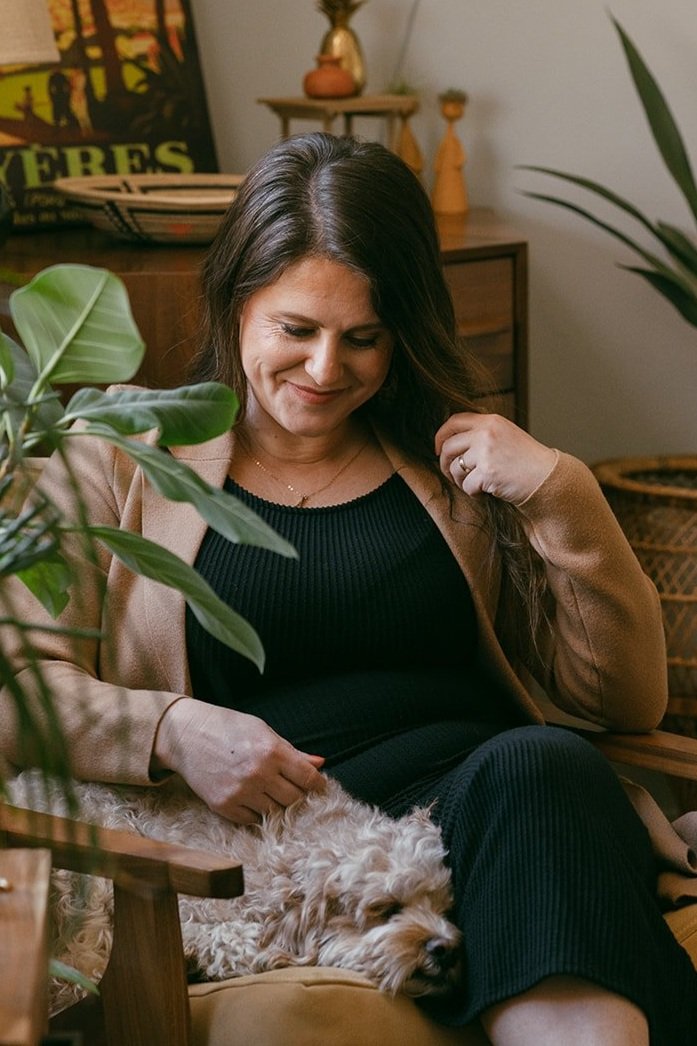
Hi, I’m Wendy Dyer, a portrait artist who brings life to colored pencils and acrylics from the comfort of my home studio. I’m a wife, mom to two amazing sons, and proud dog mom. My art is a reflection of the world around me—capturing the emotion, beauty, and details that make each person unique.
When I'm not creating, you'll likely find me spending time with my family, whether it’s enjoying a quiet moment with my husband, cheering on my sons at their latest adventures, or out exploring with our playful dog. My art process is deeply personal, and I love the quiet focus of working from home, where I can bring every portrait to life with careful attention to detail.
Through the soft hues of colored pencil or the bold strokes of acrylic, I’m passionate about using my art to celebrate the people, pets and places I’m fortunate enough to capture on canvas. Each piece is a labor of love, and I’m so grateful to share my work with others.